
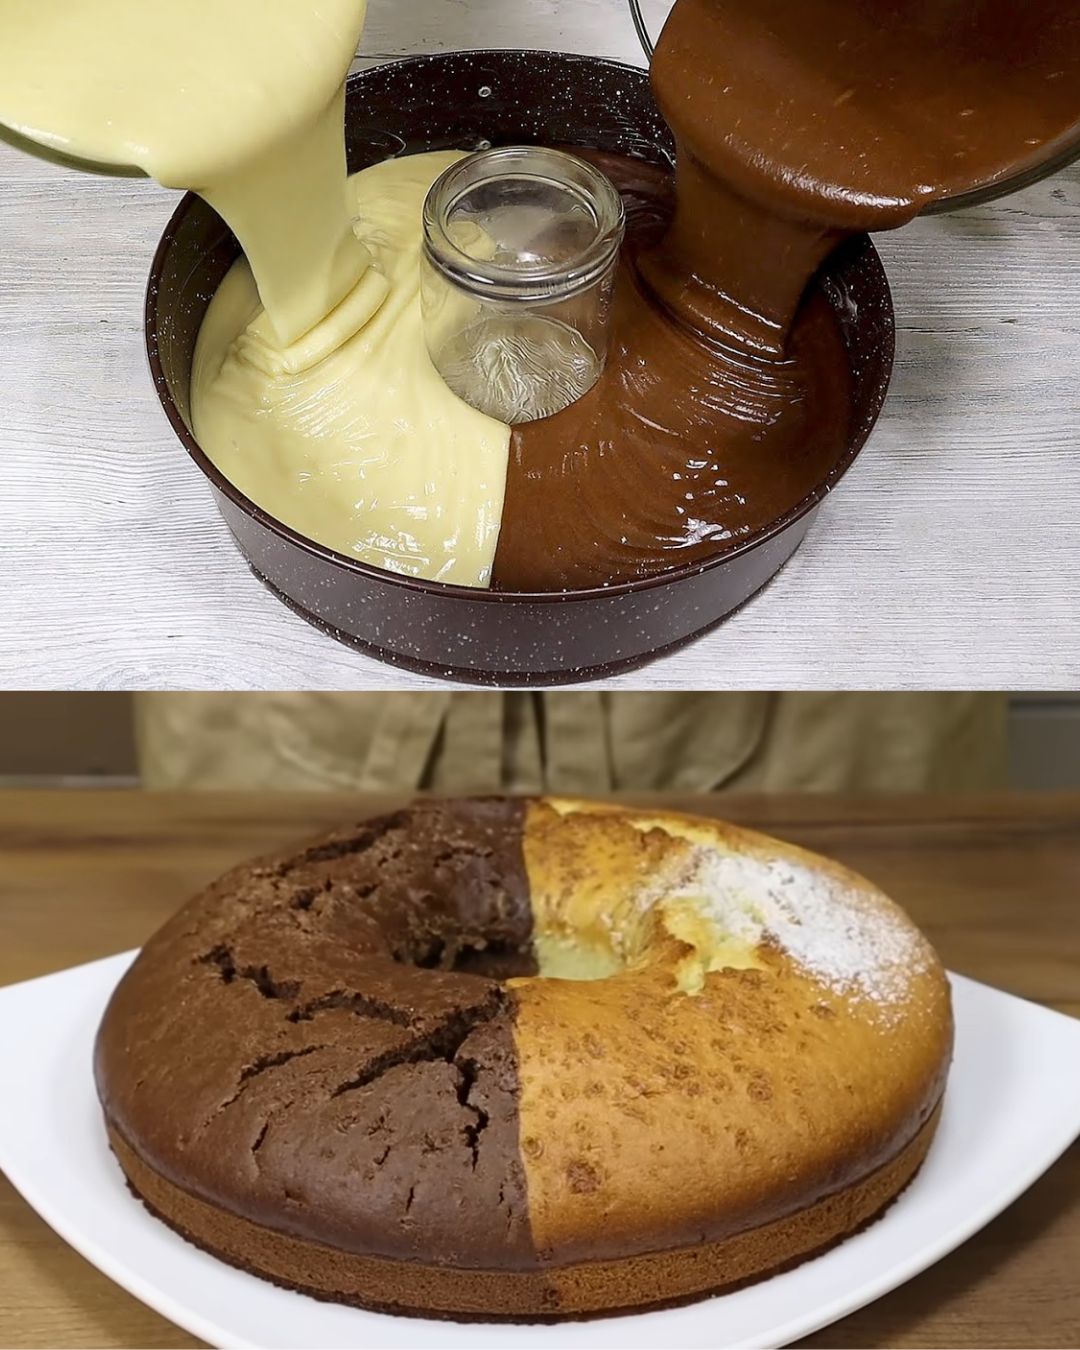
When you’re short on time but craving a homemade treat, this easy cake recipe comes to the rescue. With just a few simple ingredients and minimal preparation, you can have a delicious cake ready for tea in no time. Whether you’re hosting unexpected guests or just need a quick dessert, this recipe is perfect for any occasion.
Advertisement
Full Recipe:
Ingredients:
- 3 eggs: Eggs are the base of this cake, providing structure and helping to bind the ingredients together. They also add richness and moisture.
- 1 glass (200 ml) sugar: Sugar not only sweetens the cake but also helps to achieve a light, tender crumb.
- 1 glass (200 ml) milk: Milk adds moisture to the cake and helps to create a smooth batter. You can use any type of milk, including whole, skim, or a non-dairy alternative.
- 100 ml vegetable oil: Oil keeps the cake moist and adds a tender texture. It also helps to mix the batter smoothly.
- 350 grams flour: Flour is the main dry ingredient that gives the cake structure. For a lighter texture, sift the flour before measuring.
- 10 grams baking powder: Baking powder is the leavening agent that helps the cake rise and become fluffy.
- 1 gram vanillin: Vanillin adds a subtle vanilla flavor to enhance the overall taste of the cake.
- 2 tablespoons cocoa powder (+ 2 tablespoons of water): Cocoa powder gives the cake a rich chocolate flavor. Mixing it with water creates a chocolate paste that blends seamlessly into the batter.
- Butter for greasing the mold: Butter prevents the cake from sticking to the pan, ensuring it comes out clean and intact.
Instructions:
- Preheat the Oven:
- Preheat your oven to 180°C (350°F). This ensures the oven is at the right temperature when the cake goes in, allowing for even baking.
- Prepare the Batter:
- In a large mixing bowl, whisk together the eggs and sugar until light and frothy. This step incorporates air into the mixture, which helps the cake rise.
- Add the milk and vegetable oil to the egg mixture, and whisk until well combined.
- In a separate bowl, sift together the flour, baking powder, and vanillin. Gradually add the dry ingredients to the wet ingredients, stirring until just combined.
- In a small bowl, mix the cocoa powder with 2 tablespoons of water to form a smooth paste. Gently fold the cocoa paste into a portion of the batter to create a marbled effect. If you prefer a fully chocolate cake, mix the cocoa paste into the entire batter.
- Prepare the Baking Pan:
- Grease your baking pan with butter to ensure the cake doesn’t stick. You can use any pan size you have on hand; just adjust the baking time as needed. For a thicker cake, use a smaller pan, and for a thinner cake, use a larger pan.
- Pour and Bake:
- Pour the batter into the prepared pan, spreading it evenly.
- Bake in the preheated oven for 25-30 minutes, or until a toothpick inserted into the center comes out clean. Baking times may vary based on your oven and pan size, so keep an eye on the cake.
- Cool and Serve:
- Allow the cake to cool in the pan for about 10 minutes, then transfer it to a wire rack to cool completely.
- Once cooled, you can dust the cake with powdered sugar or frost it if desired, though it’s delicious on its own.
Tips for Success:
- Mix Gently: When combining the wet and dry ingredients, mix until just combined. Overmixing can lead to a dense cake.
- Check for Doneness: Since oven temperatures can vary, start checking the cake a few minutes before the suggested baking time. The cake should be golden brown and a toothpick should come out clean.
- Customize the Flavor: Feel free to add extras like chocolate chips, nuts, or fruit to the batter for a personalized touch.
- Storage: Store any leftover cake in an airtight container at room temperature for up to 3 days. You can also freeze it for up to a month; just make sure to wrap it tightly in plastic wrap before freezing.
Possible Questions:
- Can I use a different type of oil? Yes, you can substitute vegetable oil with other oils like canola or coconut oil.
- What if I don’t have vanillin? You can substitute vanillin with 1 teaspoon of vanilla extract for a similar flavor.
- Can I make this cake gluten-free? You can use a gluten-free flour blend in place of regular flour to make this cake gluten-free.
- How can I make the cake richer? Add a cup of chocolate chips or swirl in some caramel sauce for extra flavor.
- What can I serve with this cake? This cake pairs wonderfully with a cup of tea or coffee. You can also top it with fresh fruit, whipped cream, or a simple glaze for added indulgence.
Conclusion:
This quick and easy cake recipe is a lifesaver for busy days when you need a homemade treat in a flash. With just a few basic ingredients and minimal prep time, you can create a delicious, moist cake that’s sure to impress. Whether you’re enjoying it with a cup of tea or sharing it with friends and family, this cake is bound to become a go-to favorite in your recipe collection. Enjoy baking and savoring this delightful treat!

Quick and Delicious Cake for Tea
Ingredients
Method
- Preheat the Oven: Preheat your oven to 180°C (350°F). This ensures the oven is at the right temperature when the cake goes in, allowing for even baking.
- Prepare the Batter: In a large mixing bowl, whisk together the eggs and sugar until light and frothy. This step incorporates air into the mixture, which helps the cake rise.
- Add the milk and vegetable oil to the egg mixture, and whisk until well combined.
- In a separate bowl, sift together the flour, baking powder, and vanillin. Gradually add the dry ingredients to the wet ingredients, stirring until just combined.
- In a small bowl, mix the cocoa powder with 2 tablespoons of water to form a smooth paste. Gently fold the cocoa paste into a portion of the batter to create a marbled effect. If you prefer a fully chocolate cake, mix the cocoa paste into the entire batter.
- Prepare the Baking Pan: Grease your baking pan with butter to ensure the cake doesn’t stick. You can use any pan size you have on hand; just adjust the baking time as needed. For a thicker cake, use a smaller pan, and for a thinner cake, use a larger pan.
- Pour and Bake: Pour the batter into the prepared pan, spreading it evenly.
- Bake in the preheated oven for 25-30 minutes, or until a toothpick inserted into the center comes out clean. Baking times may vary based on your oven and pan size, so keep an eye on the cake.
- Cool and Serve: Allow the cake to cool in the pan for about 10 minutes, then transfer it to a wire rack to cool completely.
- Once cooled, you can dust the cake with powdered sugar or frost it if desired, though it’s delicious on its own.