Ingredients
Method
Preparation
- Preheat Your Oven: Start by preheating your oven to 170°C (340°F). This ensures that the oven is at the perfect temperature by the time your cookies are ready to bake. Line a baking sheet with parchment paper or a silicone baking mat to prevent the cookies from sticking.
- Cream the Butter and Sugar: In a large mixing bowl, beat the softened butter and icing sugar together until the mixture is light and fluffy. This step is crucial because it incorporates air into the dough, giving the cookies a light, airy texture. This should take about 3-5 minutes with an electric mixer on medium speed.
- Incorporate the Egg and Vanilla: Add the egg and vanilla essence to the butter-sugar mixture, and continue to beat until everything is well combined. The mixture should be smooth and creamy, with no lumps. The vanilla essence will infuse the dough with its sweet aroma, making your kitchen smell heavenly as you bake.
- Mix in the Dry Ingredients: In a separate bowl, sift together the cake flour, corn starch, and milk powder. Sifting helps to aerate the flour, preventing lumps and ensuring a smooth dough. Gradually add the dry ingredients to the wet mixture, beating on low speed until just combined. Be careful not to overmix, as this can make the cookies tough.
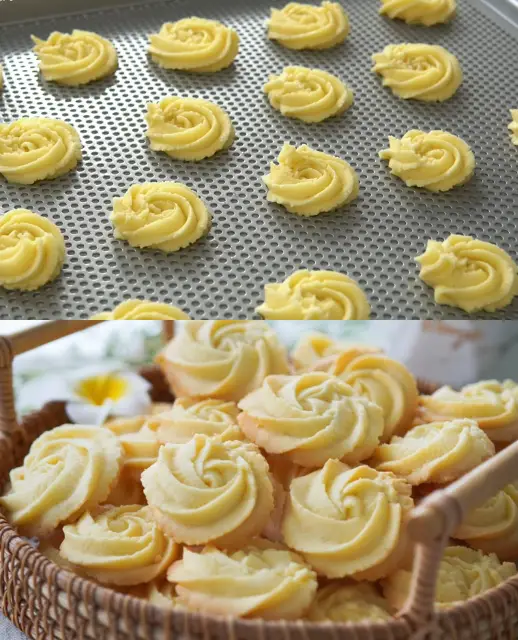
- Shape the Cookies: Transfer the dough into a piping bag fitted with a large star tip. Piping the dough gives the cookies their classic shape and decorative edges. If you don’t have a piping bag, don’t worry—you can still make delicious cookies. Simply roll the dough into small balls and flatten them slightly with a fork for a more rustic appearance. Space the cookies evenly on the prepared baking sheet, leaving a bit of room between each one as they will spread slightly during baking.
- Bake to Perfection: Place the baking sheet in the preheated oven and bake for 12-15 minutes, or until the edges of the cookies are just starting to turn golden. It’s important not to overbake them; Danish Butter Cookies should remain light in color for the best flavor and texture. If they get too dark, they can become dry and lose that melt-in-your-mouth quality.
- Cool and Enjoy: Once baked, let the cookies cool on the baking sheet for a few minutes before transferring them to a wire rack to cool completely. This cooling time allows them to firm up slightly, making them easier to handle. Once cooled, they’re ready to be enjoyed!
- Storage Tips: Store your Danish Butter Cookies in an airtight container at room temperature. They’ll stay fresh and crisp for up to a week—although they rarely last that long in my house! If you want to keep them even longer, you can freeze the cookies in an airtight container for up to a month. Simply let them thaw at room temperature before serving.