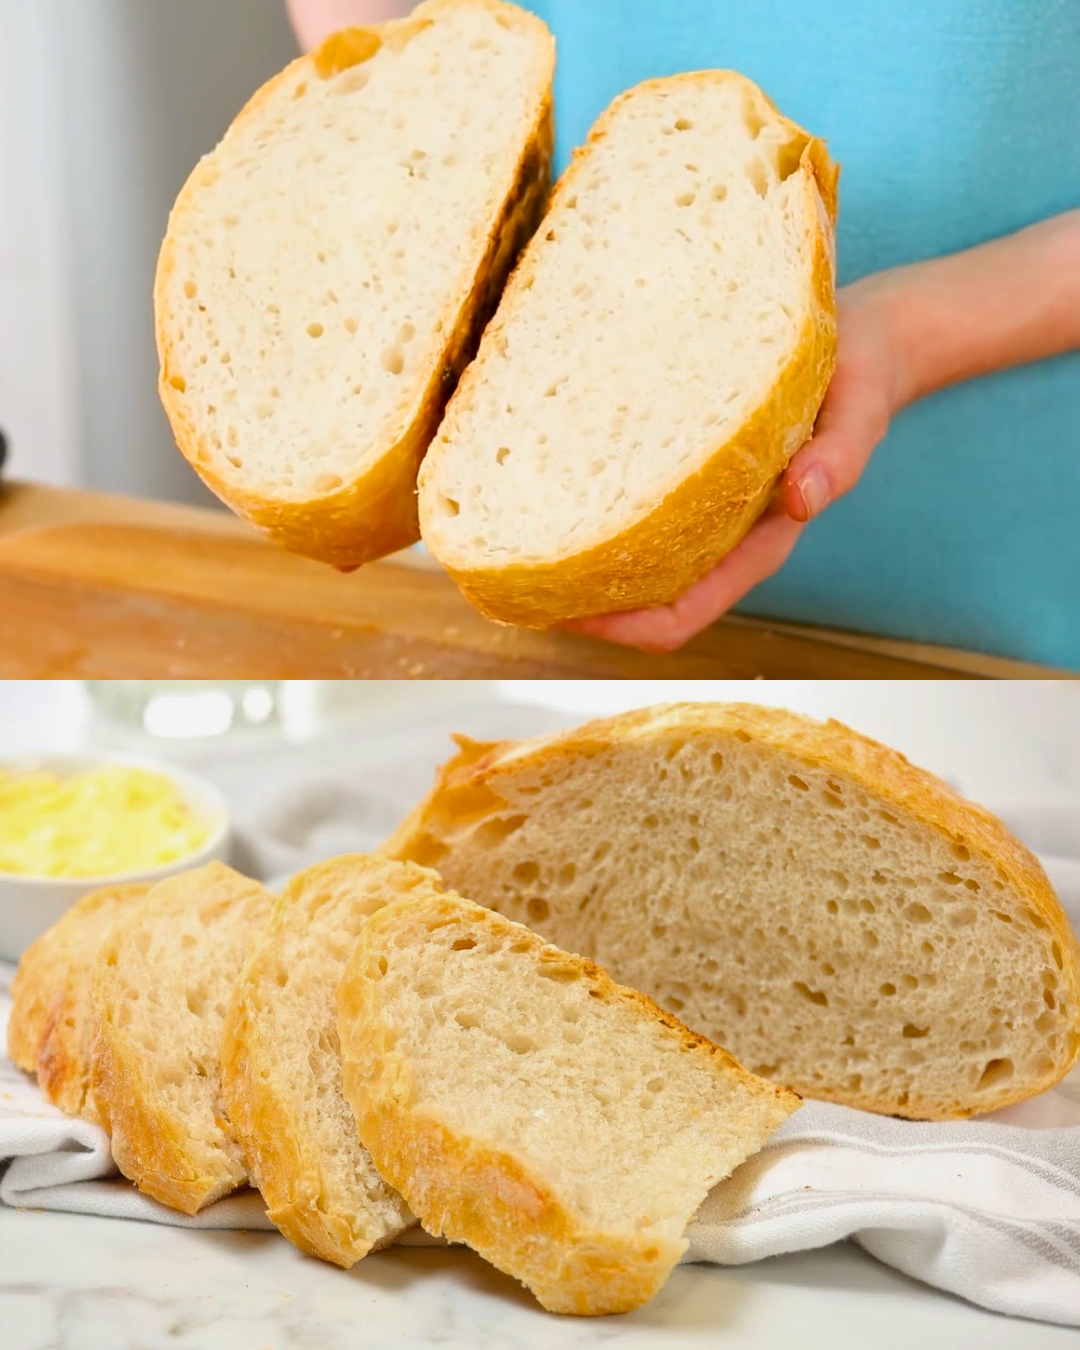
Making homemade bread doesn’t have to be difficult or time-consuming. This no-knead bread recipe requires minimal effort and results in a delicious, rustic loaf with a crunchy crust and soft, airy inside. By allowing the dough to rise slowly, you get a rich, flavorful bread that’s perfect for sandwiches, toast, or enjoying with a dollop of butter. No bread machine or kneading required—just a few basic ingredients and patience for the dough to work its magic!
Preparation Time
- Prep Time: 5 minutes
- Cook Time: 30-35 minutes
- Total Time: 2 hours (including rising time)
Ingredients
- 1/2 teaspoon dry active yeast
- 1 cup warm water
- 1 teaspoon sugar
- 3 cups all-purpose flour
- 1 1/2 teaspoons salt
Directions
1. Activate the Yeast:
- In a small bowl, combine 1 cup of warm water (about 110°F or 45°C), 1/2 teaspoon of dry active yeast, and 1 teaspoon of sugar. Stir gently to combine and let it sit for about 5-10 minutes until the mixture becomes frothy. This step activates the yeast.
2. Mix the Dry Ingredients:
- In a large bowl, combine 3 cups of all-purpose flour and 1 1/2 teaspoons of salt. Stir to evenly distribute the salt throughout the flour.
3. Combine Wet and Dry Ingredients:
- Once the yeast mixture is frothy, pour it into the bowl with the flour and salt. Mix with a wooden spoon or spatula until a sticky dough forms. The dough will be shaggy, but that’s okay—no kneading required!
4. Let the Dough Rise:
- Cover the bowl with a clean kitchen towel or plastic wrap and let the dough rise at room temperature for about 1 to 1 1/2 hours. The dough should double in size.
5. Preheat the Oven:
- About 20 minutes before the dough is done rising, preheat your oven to 450°F (230°C). Place a Dutch oven or heavy oven-safe pot with a lid inside the oven while it preheats. The pot will help create a crispy crust by trapping steam.
6. Shape the Dough:
- Once the dough has risen, use a spatula or your hands to gently shape the dough into a rough ball. Dust the work surface with a little flour, and transfer the dough into the preheated Dutch oven. Don’t worry about shaping it perfectly—it’s supposed to be rustic.
7. Bake the Bread:
- Cover the Dutch oven with the lid and bake for 30 minutes. After 30 minutes, remove the lid and bake for an additional 10-15 minutes to allow the top to brown and crisp up.
8. Cool and Serve:
- Once the bread is golden brown and has a hollow sound when tapped on the bottom, remove it from the oven and let it cool on a wire rack. Slice and enjoy!
Serving Suggestions
- As a Sandwich: Use this bread as the perfect base for a hearty sandwich or a grilled cheese.
- With Butter and Jam: Serve it warm with butter, honey, or your favorite jam for a simple, comforting treat.
- With Soup or Salad: This rustic bread pairs beautifully with a bowl of soup or a fresh salad as a light lunch or dinner.
Cooking Tips
- Use warm water: Ensure the water is warm, not hot, to activate the yeast properly. Too hot can kill the yeast, while too cold may not activate it.
- Let it rise properly: Don’t rush the rise time. The longer the dough rises, the more flavor it will develop. Ideally, let the dough rise for 1-2 hours at room temperature.
- Add herbs or spices: For extra flavor, try adding herbs like rosemary, thyme, or garlic powder to the dough before rising.
Variations to Try
- Herbed Bread: Mix in some dried herbs, like rosemary or thyme, to add extra flavor.
- Whole Wheat Bread: Substitute half of the all-purpose flour with whole wheat flour for a heartier bread.
- Cheese Bread: Add some shredded cheese to the dough before baking for a cheesy, savory twist.
Nutritional Benefits
This no-knead bread provides a good amount of carbohydrates and fiber, especially if you use whole wheat flour in place of some of the all-purpose flour. It’s also a simple bread with minimal ingredients, so it’s free from unnecessary additives. With the right toppings, this bread can be part of a balanced meal.
Conclusion
This no-knead bread is simple, delicious, and requires minimal effort. With just a few ingredients and a little patience, you can enjoy homemade bread with a golden crust and soft, airy interior. Perfect for beginners or anyone who loves fresh, homemade bread without the need for a bread machine!
Frequently Asked Questions
-
Can I make this bread without a Dutch oven? Yes, you can bake the bread on a baking sheet. Just place the dough on parchment paper and cover it with a large bowl or another oven-safe dish to trap steam.
-
Can I make this bread ahead of time? Yes, you can prepare the dough the night before and refrigerate it overnight. Let it sit at room temperature for about 30 minutes before baking.
-
Can I freeze this bread? Yes, you can freeze this bread once it has cooled completely. Wrap it tightly in plastic wrap or foil and store it in a freezer bag for up to 3 months. Thaw and reheat in the oven when ready to eat.
-
How do I know when the bread is done? The bread is done when it’s golden brown on top and has a hollow sound when tapped on the bottom. You can also use a thermometer to check; the internal temperature should be around 200°F (93°C).
-
Can I add other ingredients to the dough? Yes, feel free to get creative! You can add nuts, seeds, dried fruits, or cheese to the dough before the final rise for a customized loaf.

