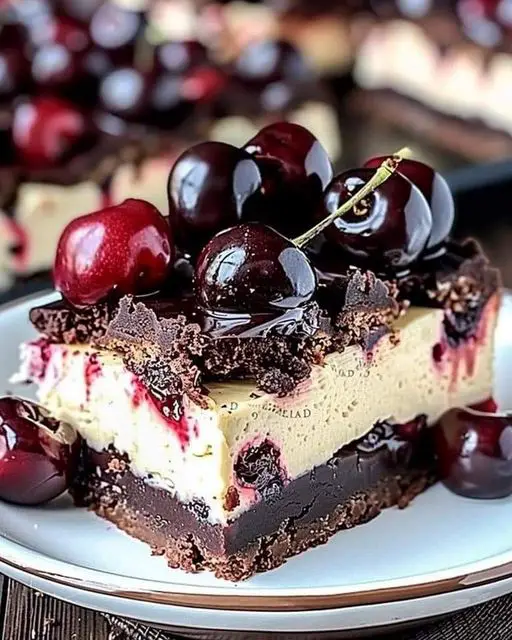
Chocolate Cherry Cheesecake Bars are a delectable dessert that combines a crunchy chocolate cookie crust, a smooth and creamy cheesecake filling, and a deliciously tart cherry topping. With an added sprinkle of chocolate chips, these bars are perfect for anyone who loves the classic combination of chocolate and cherries. These bars are easy to make and a hit at gatherings, or even as an indulgent treat for yourself!
Full Recipe:
Ingredients:
For the Crust:
- 1 ½ cups chocolate cookie crumbs
- ½ cup unsalted butter, melted
- 2 tablespoons granulated sugar
For the Cheesecake Filling:
- 16 oz cream cheese, softened
- ½ cup granulated sugar
- 2 large eggs
- 1 teaspoon vanilla extract
- ½ cup sour cream
- 1 cup cherry pie filling
- ½ cup semi-sweet chocolate chips
Step-by-Step Instructions
Step 1: Preheat the Oven and Prepare the Baking Pan
- Preheat the Oven: Preheat your oven to 350°F (175°C).
- Prepare the Pan: Line an 8×8-inch baking pan with parchment paper, leaving a slight overhang on the sides to make it easier to lift the bars out of the pan later.
Step 2: Make the Chocolate Cookie Crust
- Combine Ingredients for Crust: In a medium bowl, mix the chocolate cookie crumbs, melted butter, and granulated sugar until the mixture resembles wet sand.
- Press into Pan: Press the crust mixture evenly into the bottom of the prepared baking pan, using the back of a spoon or the bottom of a measuring cup to compact it.
- Bake the Crust: Bake the crust in the preheated oven for 10 minutes. Remove from the oven and let it cool while you prepare the filling.
Step 3: Prepare the Cheesecake Filling
- Beat Cream Cheese and Sugar: In a large mixing bowl, beat the softened cream cheese and granulated sugar together with an electric mixer on medium speed until smooth and creamy, about 2-3 minutes.
- Add Eggs and Vanilla: Add the eggs one at a time, beating well after each addition, then add the vanilla extract and mix until combined.
- Add Sour Cream: Gently fold in the sour cream until the mixture is smooth and creamy.
Step 4: Assemble the Cheesecake Bars
- Pour Filling Over Crust: Pour the cheesecake filling over the cooled chocolate crust, spreading it evenly with a spatula.
- Add Cherry Pie Filling and Chocolate Chips: Spoon dollops of cherry pie filling onto the cheesecake layer, then use a knife or toothpick to gently swirl the cherries into the filling for a marbled effect. Sprinkle the semi-sweet chocolate chips on top.
Step 5: Bake the Cheesecake Bars
- Bake: Place the pan in the preheated oven and bake for 30-35 minutes, or until the edges are set and the center has a slight wobble. Avoid overbaking, as it can cause cracks in the cheesecake.
- Cool the Cheesecake: Remove from the oven and let the cheesecake bars cool in the pan for 1 hour. Then, transfer the pan to the refrigerator and chill for at least 2 hours, or overnight for the best texture.
Step 6: Slice and Serve
- Lift and Slice: Once the cheesecake is thoroughly chilled, use the parchment overhang to lift the cheesecake out of the pan. Place it on a cutting board and cut into squares or rectangles.
- Serve: Serve the cheesecake bars chilled and enjoy! They can be garnished with additional chocolate chips or a dollop of whipped cream if desired.
Nutrition Facts (Per Serving):
- Calories: ~300
- Protein: 5g
- Carbohydrates: 27g
- Sugars: 20g
- Fat: 20g
- Fiber: 2g
- Sodium: 160mg
FAQ
1. Can I Use a Different Fruit Topping?
- Absolutely! Blueberry, raspberry, or strawberry pie filling work wonderfully with the chocolate cheesecake base, allowing for a variety of flavors.
2. Can I Make This Recipe Gluten-Free?
- Yes! Use gluten-free chocolate cookies for the crust and ensure all other ingredients are gluten-free. Most pie fillings and dairy ingredients are naturally gluten-free.
3. What If I Don’t Have Sour Cream?
- You can substitute Greek yogurt or even crème fraîche for sour cream. These will maintain the creamy texture with a slightly tangy flavor.
4. Can I Make This Ahead of Time?
- Definitely! These bars are best made a day in advance so they have plenty of time to set. Keep them in the fridge until ready to serve.
Tips for Making the Perfect Chocolate Cherry Cheesecake Bars
- Use Room Temperature Ingredients: Softened cream cheese and room-temperature eggs ensure a smoother, creamier filling.
- Avoid Overbaking: Bake until the edges are set and the center has a slight jiggle. Overbaking can cause the cheesecake to crack.
- Chill Thoroughly: Letting the cheesecake bars chill for at least 2 hours helps them set properly, making them easier to slice and giving the best texture.
Storage Tips
Store leftover bars in an airtight container in the refrigerator for up to 5 days. If you’d like to freeze them, place the bars on a baking sheet to freeze individually, then wrap each bar in plastic wrap and place them in a freezer-safe container for up to 3 months. Thaw in the refrigerator overnight before serving.
Conclusion
Chocolate Cherry Cheesecake Bars are the perfect treat for any occasion, combining rich chocolate, creamy cheesecake, and tart cherries into one indulgent dessert. These bars are easy to make, visually stunning, and absolutely delicious. With the layered texture of the cookie crust, smooth cheesecake filling, and swirled cherry topping, every bite is an irresistible blend of flavors and textures.
Whether you’re baking for a special occasion or simply want to treat yourself, these cheesecake bars are sure to be a hit. Try different toppings or add a sprinkle of chocolate chips for even more decadence. Enjoy each delightful bite of this creamy, fruity, and chocolatey dessert!

